Getting connected on Github
GitHub is used to store all of the code used to create the visualisations. This is so we can easily share code that is in development, or use code from existing visualisations.
Once the developer (you) has set up a repository on GitHub, either the command prompt or GitKraken are used to make a copy of the repository on GitHub and store it locally (on your computer). From here, you can edit it. Documented below is how to use all of these tools and services.
Creating a Github account
If you don’t have a GitHub account, follow the instructions here to create one. You will need a new username and an email address; your college email should be fine! Once you have completed your setup (don’t worry too much about customization along the way), you will receive a verification email on your registered email account. Open the email and click “verify email address.” Doing this will open GitHub logged into your new account and ask what you want to do first. If you wish to learn more about GitHub, you can follow one of their suggested options. However, you can skip this if you only want to use GitHub for ImpVis for now.
Command and Gitkraken
Once you have a GitHub account, you can clone the repository (copy it to your local computer), make changes, and upload them to GitHub so that your changes get updated.There are two classic ways that we do this at Imperial Visualisations. One way is using Command, and the other is using GitKraken.Command and GitKraken are equivalent methods to allow communications between your machine and our GitHub. Command (or Terminal) uses line commands, while GitKraken is an app that has all the equivalent actions.
Both have their pros and cons; for example, GitKraken is more visual, has a shallower learning curve, and less to remember in order to be able to use it. On the other hand, Command works much faster and is more straightforward to fix the level of issues dealt with in Code & Crisps. If you continue programming in the future, you will most likely need to know how to use Command eventually. You also look more like a hacker when using Command. For further information about the benefits of using Gitkraken and Command, check out this comparison (by GitKraken...): https://support.gitkraken.com/pdf/infographic/gitkraken-vs-cli.pdf. We do not have a preference for which one of these you use, half of us recommend using Command, the other half Gitkraken. The choice is yours!
Once you have chosen, there are a few steps that you need to go through in order to make changes to files on GitHub. Here are some instructions on how to each step necessary to create and make changes to files you want on GitHub.
Step 1: Downloading the service
Command: Congratulations, you already did - this is built in as Command Prompt on Windows or Terminal on MacOS.
GitKraken: To download GitKraken, please visit https://www.gitkraken.com/download and download it to a location you will remember.
Step 2: Opening the service and signing in
Command: You may search in your machine for Command Prompt or Terminal.
GitKraken: Open a GitKraken window from wherever you saved it. Opening GitKraken can sometimes take a few minutes. Once you see the image to the right, click “Sign in with GitHub.” That should take you to a screen which looks like picture 2.
Click “Continue authorization.” That should take you to a GitHub login page (picture 3).
Use your already made GitHub username and password. If you authorized your email for your GitHub account earlier, then signing in correctly there will take you to the page as seen in picture 4. Click “Authorize Axosoft.” Once you have done this, you will see
This means you can safely close that tab and go back to your Gitkraken window. Opening this will take you now to “Set up your profile,” where you choose your avatar and account name. Go ahead and agree with the terms and conditions. No need to start a free trial of GitKraken pro, their free version does everything we need.
Step 3: Cloning a repository (in command)
In order to access the desired repository, we must clone it onto your local computer. To clone a REPOSITORY owned by USERNAME, use git clone https://github.com/USERNAME/REPOSITORY our local computer. To clone a REPOSITORY owned by USERNAME, use git clone https://github.com/USERNAME/REPOSITORY (Note, press enter to execute commands). For example, if I wanted to clone a repository such as “Lattice-Vibrations” I would do the following:
- Create a folder on my computer with which I would like to clone the repository e.g., ImpVis_projects
- Then in the command line navigate to the folder you just created.
Note, to navigate in command, Use cd directory to navigate into a folder from the current folder you’re in. If you make a mistake, use cd .. To navigate to your root directory, use cd / An example: For me, the writer, say I wanted to reach my “Lattice Vibrations” folder in command, and say the root to that folder was from the C drive which contained a folder “Visualizations”, which contained the “Lattice Vibrations folder”, then I’d use: 1.) cd / to get back to the C drive. 2.) cd Visualizations to open “Visualizations”, then 3.) cd Lattice-Vibrations to get into the “Lattice-Vibrations” folder. In Command, that would look something like
At this point, command is “in” the Lattice-Vibrations folder, and is ready to carry out commands from there.
If you’d like further advice on how to navigate in command, check out: command cheat sheet.
Once you’ve opened the file you created earlier, enter git clone https://github.com/Imperial-visualizations/Lattice-Vibrations. git. Now that you have a local repository! You can now look at the code of the visualization in an IDE of your choice (most of us use VSCode).
Step 3: Cloning a repository (in Gitkraken)
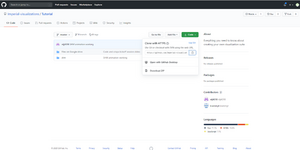
GitKraken: To clone a repository to a location, you need two things: a repository to clone, and a location to clone it to. First, choose a repository to clone by going to https://github.com/Imperial-visualizations and selecting a repository (by clicking on one of the prominent blue hyperlinks), for example, Lattice-Vibrations. Once you have opened the repository location on GitHub, you can copy the location. Do this either by copying the URL at the top of the screen or by clicking the green “code” button, followed by the copy icon (grey button).
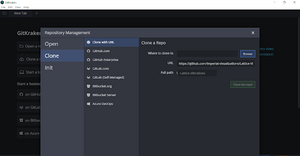
Once you have copied the repository location, open GitKraken, once you have, click (on the top left of the screen) on “File” > “Clone Repo.” “Clone with URL” should already be selected, but if it is not, select that. Then, paste the repository location into the URL entry as here:
(using the Lattice-Vibrations repo as an example again: https://github.com/Imperial-visualizations). The steps above are everything needed to link up the repository location correctly. Now you have to select a location to clone this repository to. To do this, click on Browse, go to the location you want to store these files (perhaps create a new file), click open older, and finally "Clone the repo!". Once you've made the clone, you can open the repository. Do this by clicking "Open now" when it is finished cloning, or later by clicking on "File"> "Open Repo," and select the folder that you cloned the repository to.
Creating a branch
When you're working on a project, you're going to have a bunch of different features or ideas in progress at any given time – some of which are ready to go, and others which are not. Branching exists to help you manage this workflow. When you create a branch in your project, you're creating an environment where you can try out new ideas. Changes you make on a branch don't affect the main branch, so you're free to experiment and commit changes, safe in the knowledge that your branch won't be merged until it's ready to be reviewed by someone you're collaborating with.
You ideally want to be working in a branch that is not master within your repository. You want to have some working version of the code in master. You can build any experimental or new feature in a branch such as dev (for development). This divide means that you will always have a functional version of the visualization!
Command:
To create a new branch (let’s call it dev) within your local repository, enter git branch dev into the terminal. Then, to move your working space into that branch, use git checkout dev .
Gitkraken:
To create a new branch within your local repository for development of code (using the same example of a development branch), (in Gitkraken,) right-click on the ‘master’ branch from the ‘Local’ dropdown followed by ‘create a branch here.’ Now you may name it ‘dev’, and start to develop the code. Again, it is better to work on the dev branch than the master branch.
Making a repository
At some point, you may want to write your own independent vis or suite in a new repository. As part of the work for the ImpVis website, this repository must be created on the ImpVis repository.
Command[not actually using command line just github]:
- Go to https://github.com/Imperial-visualizations
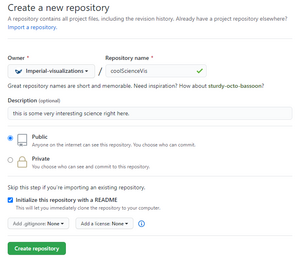
- Click New(green button near top right)
- Enter the details of the new repository, name, etc. Make sure to make the repository public so that other developers can access your code! That’s it. You can now clone the repository and start working on your project.
GitKraken: Click on File > Init Repo > GitHub.com and change the account to imperial-visualizations (you need to have the developer’s permission). You may fill in the desired name, description, and ‘where to clone to’ on your machine. Please note that the access must be public as ImpVis is an open-sourced website. Once you have clicked ‘Create Repository and Clone’, you may open the cloned repository and use it.
Making and pushing a commit
Once you have done some changes to your code and are happy with your progress, you may want to save (push) it to the repository on Git. The first step is to make a commit of the changes you like.Having a commit in the GitHub history when stuff is working is great because if you accidentally make some mistakes in your code and can't change them, then reverting to these commits (savepoints) is precisely what you need. Always keep this in mind! Make sure to commit your code with a descriptive message as frequently as possible even if it's not working; that way, you can always go back to something that was slightly less broken if the situation worsens. Avoid pushing straight to master; instead, push your changes to a separate branch and then merge into master.
Command: Git commands are performed inside of the cloned git repository. First, you must navigate to the folder inside of the command line. Once there, run git status to see how many commits, and you are ahead of or behind origin. To commit something, we first have to identify the files we want to add to the commit; this can be done by adding individual files using git add myFileName or to just add all the files in the repository just use git add. This is the lazy option but very effective. Once all the desired files are added, you then commit them; this is done via git commit -m ``message describing the commit, what have I changed or done” the message associated with the commit is vital, as it lets you know what you were doing at this point, should you need to revert future code to this point. Now that you have committed, you want to push those changes to the remote directory so that other people can access them. This is done using git push.
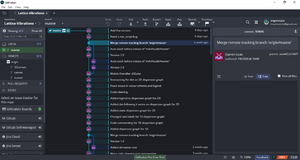
Gitkraken:GitKraken will tell you the file changes in the working directory. You should click on ‘view the changes.’ In the ‘Unstaged Files’ section, you should be able to click on the files that have changes to them and view the changes comparing line by line before and after the change. At this point, you still can decide whether to keep certain changes by using the ‘Discard Hunk’ (remove this change) and ‘Stage Hunk’ (put this change into the drafted commit) buttons. If you are sure of all, you can use the ‘Stage all Changes’ button without checking every single changed file. Similarly, you can try to revert all the changes using the ‘Discard All Changes’ bin button. Once you have checked all the changes, you should write the commit message and press the commit button. If no new changes are coming from the Git, you should be able to push the commit to Git. If the push is successful, you have now made the changes on Git!
Merging branches
Let’s say that you have done a few commits and have a version of your vis that you are ready for a milestone saving of all the commits; you can merge the dev branch into master.
Command: If I wanted to merge in my experimental code, which I have now thoroughly tested from the dev branch into the master branch, I would do the following. Navigate to the local repository folder (using cd), then git checkout master. This moves us into the master branch, then git merge dev, merges dev with master. You would then have to resolve any merging conflicts that arise.
GitKraken: You should check into master then right-click on dev followed by ‘merge dev into master.’
Having more than one developer
There are inevitable commits done by other developers in between your commits when there is more than one developer. After you have made your commit, but before you push it, you should pull the new commits. Remember, pull before you push!
Command:
In the case that you have multiple people working on one repository, you will need to account for their changes too. This requires the use of the pull merge commit push system, whereby just before you push your changes, you first pull from the directory using git pull, then git will merge in any changes performed by the other person. Note, it sometimes can’t do this, and you will have to manually select what code to keep, either yours, the other persons, or both. With the issues in the merge resolved, you then git add, git commit and git push as described previously.
GitKraken: Use the pull button and ‘fast-forward if possible’ option.
