Uploading a new visualisation
This page describes how to upload your visualisation. Note that each page of your visualisation is treated as a separate visualisation - each will need to go through the upload process below and each will show up separately in the 'Teach environment'. This is because other instructors may want to use any of your pages within their own module, but possibly not all. Once you have uploaded each page as a separate visualisation, you can collate them together in a Collection on the website.
Visualisation files needed
In order to upload your visualisation, you will need the following files prepared:
- Visualisation zip file A single zip file with all your code files and assets, which should contain everything your visualisation needs to run - i.e. the HTML files, JavaScript files and others such as CSS files or images that your visualisation may need. This means that if you click on the main HTML file, your visualisation should open in your browser and be fully functional. Note: all paths to assets and internal links should be relative. Also ensure that if you include any links to other web pages in your files (e.g. dependencies on other packages), you use https links (http links will not work).
- Source code zip file (optional) A single zip file with all your source code, if different from the visualisation zip file mentioned above (e.g. if you used the ImpVis template to create your visualisation).
- A screenshot image (optional) This image will be displayed on the 'visualisation card' in the 'Teach' environment on the website.
How to prepare your files
Below we describe how to prepare each of the three files to upload in reverse order.
Screenshot image
To create your screenshot image, you can either take a static screenshot of your visualisation in action or an animated gif that showcases your visualisation. Make sure your screenshot image gives a good impression of what the visualisation is about: it is the main way to catch the eye of people browsing for visualisations. An easy way to create an animated gif is to record your screen whilst you interact with your visualisation: you can download the free app ScreenToGif to do this.
Note: the recommended size of the screenshot image is 600x300px (2:1 aspect ratio).
Source code zip file
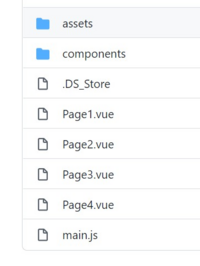
If you have built your visualisation with the ImpVis template, initially your file structure may look something like this (Lattice Vibrations visualisation example):
This is your source code - you cannot simply click on the main HTML file to run the visualisation (instead you normally view your visualisation by running 'npm run serve' in your command prompt). To create the source code zip file, simply zip the entire folder structure.
Visualisation zip file
If you did not use the ImpVis template, your source code files may be directly runnable (i.e. you can click on the HTML file to launch your visualisation), in which case you can use your source code zip file as the visualisation zip file and you can skip the below.
If you used the ImpVis template, to create the visualisation zip file you will need to enter the following command in your command prompt (in the same way as you usually run 'npm run serve'):
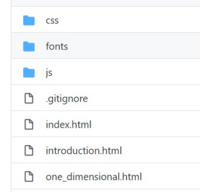
npm run buildThis will create a new folder, named 'dist'. Within this folder, your file structure will look something like this (Lattice Vibrations visualisation example):
To create the visualisation zip file, zip the newly-created 'dist' folder. Note that within the subfolders of the 'dist' folder (e.g. the 'js' folder) the files look completely different than the ones in your source code files. This file structure will allow a user to run the visualisation by clicking the main HTML file, but it will not be useful to other developers who would like to inspect your code. We therefore upload both the source code and the 'compiled' dist folder: one to give access to the code and the other to run the visualisation.
Files for multi-page visualisations
Multi-page visualisations often share assets and code. It is therefore easiest to make a single source zip file which contains all the pages and a single visualisation zip file which also includes all the pages. Although each page will have to go through the upload process below, you can upload the same zip files for each of the visualisation pages. Do make sure each page has its own screenshot image however!
Upload your files
There are two ways to upload a new visualisation:
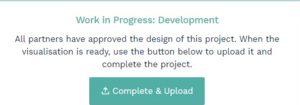
- Within your existing project management environment, click the 'Complete & Upload' button (see image to the right). This will only show up once all project partners have approved the design and if you have creator permissions. If you do not yet have creator permissions, the 'Complete & Upload' button will be replaced by a 'Request creator permission' button - once you have done so you can go back and click the 'Complete & Upload button'.
- If your visualisation did not have an associated project on the website, or you are uploading the next page of a multi-page visualisation, go to 'My Visualisations' in your MyVis dashboard and press the 'Upload New' button.
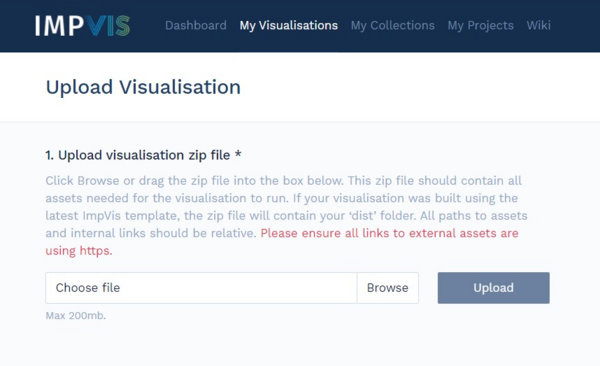
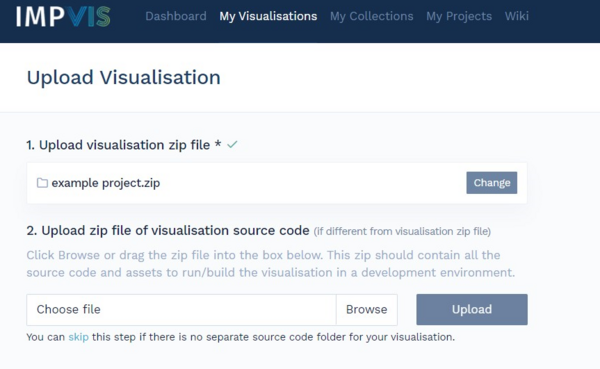
You will now be presented with the following screen:
This is where you need to upload the visualisation zip file as described above - i.e. the 'runnable' version of your visualisation (the 'dist' folder if you used the ImpVis template).
Once you've pressed the 'Upload' button, you will be asked to upload the source code zip file (again described above):
If your source code files are the same as your visualisation files, press 'skip' instead of uploading.
Next you will be asked to upload a screenshot image - again you can skip if you do not wish to supply one, in which case a default image will be used.
Finally, you will be asked to enter the following details about your visualisation:
- Visualisation name - make sure this is concise yet descriptive so users can easily understand what your visualisation is about. For multi-page visualisations, we suggest you give each page a similar yet distinct name, e.g. 'Lattice Vibrations - Introduction', 'Lattice Vibrations - 1D', 'Lattice Vibrations - 2D', 'Lattice Vibrations - 3D'.
- Authors - all developers who have contributed to this visualisation
- Description - a brief description of the topic of your visualisation. This will be displayed with your visualisation in the 'Teach' environment of the website. Do not include details of the module or department for which the visualisation is created in this description. Descriptions for multi-page visualisations should only describe the current page - each page's description should be distinct.
- Concept tags - keywords listing the concepts addressed in your visualisation. These will be used for the search facility on the website.
- Category - select all relevant categories for your visualisation. Users can filter visualisations by category on the 'Learn' and 'Teach' environment. Be as specific as possible, e.g. a visualisation about vectors fits within the 'Linear Algebra' category and should therefore not be placed under the more general 'Maths' category. However, a visualisation about refraction of electromagnetic waves fits both within the 'Waves' category and the 'Electromagnetism in a medium' categories. For multi-page visualisations all pages will usually fall within the same categories.
- Reviewers - select existing ImpVis users to review your visualisation. Your visualisation will only be published on the website when all reviewers have finished their review and at least one of those reviewers is a staff member (ideally the staff partner on your project). Make sure your reviewers are willing to review the visualisation, because if they do not take any action your visualisation will be stuck in the 'in review' stage! If you do not yet know who will review your visualisation, you can add reviewers later. For multi-page visualisations, it is best to specify the same reviewers for all pages.
- Invite reviewers - here you can specify reviewers that are not yet ImpVis users. Enter their email address and they will be invited to join ImpVis and review your visualisation.
- Notes to reviewers - all your reviewers will be sent an automated email inviting them to review your visualisation. If you wish to supply a personalised message, enter it here and it will be included in the email.
- Additional developers - if other developers contributed to this visualisation, you can select them here to give the same access to the visualisation as yourself, i.e. it will show up under 'My Visualisations' in their MyVis environment, where they can subsequently manage the visualisation.
- Wiki URL - your visualisation should have an associated project page; enter the URL to this page here (you can add this in later if needed). Multi-page visualisations usually have the same Wiki page, so you can enter the same URL for all of them.
- Beta flag - set this flag if you wish to alert users that this visualisation is in a testing stage. Users of the visualisation will be prompted to supply feedback after interacting with the visualisation for a short while. If you toggle this flag to 'on', you can edit the default message asking for feedback to specify specific questions you would like users to address, or direct them to a survey you created elsewhere. The default message includes a link to the standard feedback form for visualisations - make sure that if you delete this you include a link of your own as otherwise users will simply get a pop-up message without any way of supplying feedback!
Finally, press the 'save' button. You have now uploaded your visualisation! For multi-page visualisations, repeat the process for each of the visualisation pages.
What's next
Your visualisation status will initially be 'in review' - this means it does not show up in the 'Teach' environment of the website yet, however your specified reviewers will be able to access it and give you feedback. Once they have approved the visualisation, it will automatically be published to the 'Teach' environment.
In the mean time, you will need to create a Collection so that your visualisation will be advertised to its intended audience of learners. If your visualisation is intended to be part of a multi-page Collection, you will collate your pages when you create the Collection (so ensure you have uploaded all the pages!). You will also be able to specify the relevant module/department etc for which the visualisation is intended.
Further reading is listed below:
- How to create a Collection
- The status of your uploaded visualisation
- The review process.
- How to manage your visualisation
- Uploading a new version of your visualisation.
