Difference between revisions of "Module Timetable"
Jump to navigation
Jump to search
m (Vis critique template for reference (Final Edit)) |
|||
| Line 1: | Line 1: | ||
This rough timetable is intended as a guide only to help you understand the structure of the course and the progress you should be making by different points. You should additionally be updating your personal portfolio throughout the project. | This rough timetable is intended as a guide only to help you understand the structure of the course and the progress you should be making by different points. You should additionally be updating your personal portfolio throughout the project. The times indicated are just a rough guide and tasks may take longer. | ||
== Week 1: Introduction to Course == | == Week 1: Introduction to Course == | ||
Revision as of 10:24, 16 September 2021
This rough timetable is intended as a guide only to help you understand the structure of the course and the progress you should be making by different points. You should additionally be updating your personal portfolio throughout the project. The times indicated are just a rough guide and tasks may take longer.
Week 1: Introduction to Course
- 30 minute introduction lecture
- 15 minute intro to ImpVis lecture
- 15 minute into to using Gather Town and Miro boards
- 30 minute ice breaker activity
- 15 minute creating assessment criteria on menti
- Homework: Fill out short form to help assign you to groups.
Week 2: Project Introduction
- 30 minute lecture by Freddie with Q/A on design principles and Freddie's experience designing MOOC visualisations.
- 10 minute lecture explaining group project work and how groups have been decided
- 10 minute introduction with other team members on Gather Town
- 20 minute topic discussion with group (Discuss when you can all meet and how you want to work together.)
- 20 minute lecture introducing you to the portfolio and self reflection you should do each week.
- Homework: Research your topic to explain to your group next week.
- Homework: Miro brainstorm in groups ideas for educational design.
Week 3: Educational Design
- 30 minute lecture by subject expert + Q/A
- 30 minute group activity where each team member tries to explain their topic to each other
- 30 minute group discussion of the application of educational design ideas to their project
- 15 minute creation of assessment criteria and tasks tree (or skills matrix)
- Homework: Miro brainstorm ideas for graphical design in groups
Week 4: Graphical Design
- 30 minute lecture by subject expert + Q/A
- 30 minute group discussion of application of graphical design ideas to their project and what elements they will need
- 10 minute updating the skills matrix/task tree and assessment criteria
- Homework: Miro brainstorm ideas for interaction design in groups
Week 5: Interaction Design
- 30 minute lecture by subject expert + Q/A
- 30 minute hands on test of different visualisations and how they deal with interaction
- 30 minute group discussion of the application of interaction design ideas to their project
- 10 minute update of assessment criteria and skills matrix/task tree
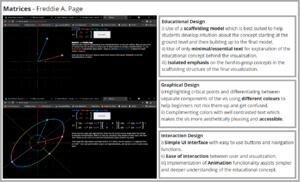
- Homework: Annotate your favourite visualisation with what you do and don't like.
Week 6: Project work
- 60 minute workshop session
- 10 minute talk on project timeline
- 20 minute discussion of skills matrix/task tree
- 20 minute discussion of important aspects of design related to each strand (education, graphical, interaction)
- 10 minute update of assessment criteria and task tree/skills matrix
- Homework: Group work
Week 7: Project work
- 60 minute workshop session
- 20 minute lecture on how to give good feedback
- 30 minute rapid feedback session
- 10 minute update of assessment criteria and task tree/skills matrix
- Homework: Group work
Week 8: Project work
- 30 minute rapid feedback session
- 60-90 minute group discussion of project design
- Homework: Group work
Week 9: Project work
- 30 minute rapid feedback session
- 30 minute lecture introducing the self assessment
- Homework: Create a poster and upload miroboard link to GatherTown
- Homework: Critique your own visualisation design based on the 3 design strands (same format as week 5)
Week 10: Review
- 60 minute GatherTown poster presentation (feel free to leave comments on other team's posters as feedback)
- 30 minute final wrap up lecture reflecting on what has been done, and explain impvis wiki. Introduce students to Code & Crisps and give them the option to implement their designs.
- Homework: Complete self assessment and reflection
