Difference between revisions of "Tutorial for setting up the coding environment"
Mark Thomas (talk | contribs) |
Mark Thomas (talk | contribs) |
||
| Line 54: | Line 54: | ||
To stop the Live Server, click on the ‘Port: 5500’ cancel button (at the bottom right). | To stop the Live Server, click on the ‘Port: 5500’ cancel button (at the bottom right). | ||
== Creating a visualisation == | |||
asd | |||
Revision as of 15:13, 15 July 2021
This page is a brief tutorial on where to find information about the coding languages used in visualisations, as well as how to set up a visualisation.
Setting up the coding envireonment
The Languages
Hypertext Markup Language (HTML) is the backbone of any webpage, and this is the case for Imperial Visualisations. HTML is less of a language and more of a collection of blocks or ‘elements’ that define what goes on your page. HTML allows us to define everything on our page, but cannot do much else. For the most part, HTML is static and cannot perform complex equations or plotting. This is where JavaScript (JS) comes in. Imperial Visualisations uses JS to perform physical/mathematical calculations, plot, and achieve interactivity. These elements can contain anything from text to a slider to a graph plot, and can be styled to your preference! From the size of your element to the text color, this styling can all be specified using another language: Cascading Style Sheet (CSS).
Here are a few Links to relevant places on how to do some basic HTML, CSS and JS -
- HTML: https://www.codecademy.com/learn/learn-html
- CSS: https://www.codecademy.com/learn/learn-css
- JS: https://www.codecademy.com/learn/introduction-to-javascript
For the HTML course, you will most likely require sections 1. Elements and Structure, and 3. Forms. You may choose to opt-out on learning CSS as we have a set of predefined components, like sliders and buttons, which will be introduced later! If you are interested in customising the components, you may come back and learn CSS. As for JS, sections 2-7 are essential, and sections 8 and 9 are useful for object-oriented programming.
While coding a visualisation, you will inevitably have to use some mathematical functions. Math.js is an extensive JS math library that provides many useful tools. For more information, https://mathjs.org/.
***From here, we will assume knowledge of basic HTML and JS.***
Visual Studio Code
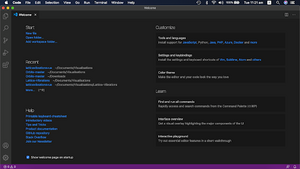
Download: Visual Studio Code (VSCode) is the integrated development environment that we recommend. Still, you are free to use any code editor that supports JS and HTML. To download VSCode, please visit https://code.visualstudio.com/download. After installing and opening it, you should find this as your welcome page (right).
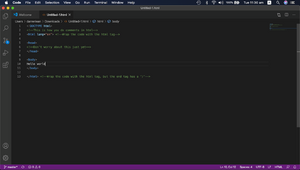
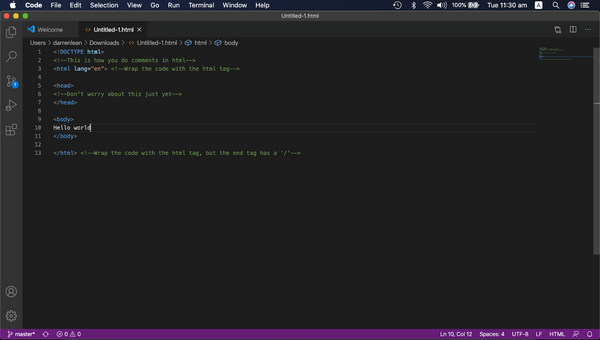
Creating a basic HTML and opening a folder in VSCode: On the top left, click on File > New File, and you should get an empty file called Untitled-1. Include the code in the following example and save it as some_name.html.
Now, open the file in a web browser (e.g., Google Chrome), you should see the the stuff on the image below:
If you have created a folder for your HTML, you may want to open the VS Code folder. You can do it by dragging the folder into the Explorer:
Live server
It is often convenient to see changes on your website while editing. For that purpose, we make use of the live server. Click on the extension button, search for Live Server, and install it.
Once you have done that, go back to the HTML file you have created and click on the ‘Go Live’ button on the bottom right.
Your HTML file will be opened in your default browser now. You can put the browser and VSCode side by side and see the changes being done live (after saving your changes). You may utilise the autosave function (in the File dropdown) if you like.
To stop the Live Server, click on the ‘Port: 5500’ cancel button (at the bottom right).
Creating a visualisation
asd


